Tuesday, March 11, 2014

Cards Are All That


Ok how many of you are slow at writing thank you cards?
Not because you don't want to and certainly not because you are not thankful, but rather, it is really hard to find meaningful card among all the cheesy silly ones.

My fix? Make your own!

I found that there are really simple ways to create a beautiful, simple card, and better yet, a whole set of stationary for only a few dollars.

Honestly, there is something so timeless about snail mail.
There is something even more timeless about snail mail in a hand made card. It brings us back to the days of Pride and Prejudice! 

Join me in my new resolution to make and send out handmade cards to our loved ones, friends near and far. Take your time writing these special pieces of art- maybe even writing in cursive, maybe even calligraphy (it's a lost art you know). Add a candle and some yummy tea (Harlow and Sons, Inc. is one of my favorites) to the mix! You might be able to bless someone in a way that they need that day! 

These are some of my favorites :) 


Stay tuned for baby room post part 2! 

                                                                      Xoxo
                                                                        K. 


Friday, January 31, 2014

Oh Boy Part 1

A dear friend of mine just had the sweetest baby boy. We (Kasi and I, Keren) have been working on small touches to add to her nursery. This mama has incredible taste of her own and has been instrumental in the ideas behind it. There will be several posts leading up to a big reveal of her darling nursery. Part 1 is a simple chalkboard. My friend already had a gorgeous frame that she wasn't using so all I had to do was find a backing and paint it. 

For the backing of the frame I bought a large plexi-glass poster frame for $10. This comes with plexi-glass and a board backing. I had my husband cut the board backing and the plexi-glass to the appropriate size using his handy power jigsaw. The board backing is important because without it you won't have any support behind the plexi-glass when you write on it. This is similar to what I bought. 
To go along with the color scheme of the nursery I purchased Martha Stewart's Multi-Surface Chalkboard Acrylic Craft Paint in gray for $5.99


Note: don't use the sponge brush pictured here. It soaks up the paint. Use a normal painter's brush. 

After one coat. 

You need to paint 2-3 coats. Let it dry several hours inbetween each coat. The directions say to let dry 1 hr but I found that the paint will crack if you don't let it dry for several hours inbetween coats. Also, make sure to paint in opposite directions each coat. One coat horizontal, one vertical etc. 

After 3 coats. 

To secure the chalkboard to the frame I nailed small nails into the back of the frame and then bent them in order to keep the frame from moving. 


The final product:

I love the gray! It will look so sweet in his nursery. More to come! 


Xoxo 

Keren 

Tuesday, January 28, 2014

Je t'aime

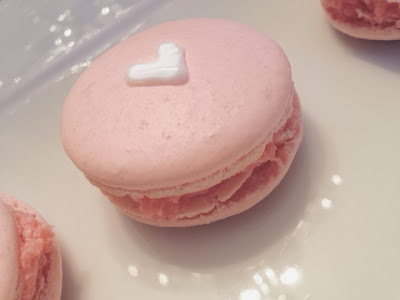
         The Perfect French Macaron 


Nothing is more romantic than Paris. And as Audrey Hepburn stated so perfectly, "Paris is always a good idea." 

So what better cookie to make for valentines day than the Parisian French macaron? 

Has anyone ever tried one of these delicate, decadent cookies? I must admit... before my attempt at making these with my sister I had never tried one and I was completely scared off by the title this cookie has earned as, "the hardest cookie to make." But I was drawn to the pretty colors, delicate look and sweet presentations. So if you haven't tried one, please, make them, then try them, it will all be worth it. 

The French Macaron is nationally acclaimed in France and is still the best selling cookie in pastry retail stores, yet another reason to try out this romantic cookie. 

Ok so, for the cookie you will need: 


1 cup confectioners' sugar 
3/4 cup almond flour/meal (a bit expensive but go directly to trader joes or whole foods) 
2 large egg whites, room temperature
Pinch of cream of tartar
1/4 cup superfine sugar
Wax paper 
Plastic bag or piping bag with tips 
Food coloring 

For the filling (I chose raspberry-but you can be creative) 

2/3 a cup of fresh raspberries 
1 stick of butter 
1 cup of confectioners sugar (you might need more) 

Step 1:
Mix confectioners sugar and almond meal in large bowl until combined. Sift 3 times. 

Step 2:
Preheat oven to 375 degrees. Whisk egg whites with a stand mixer on medium speed until the whites are foamy. Add a pinch of cream of tartar and turn mixer back on until soft peaks form. Reduce to low and add superfine sugar. Add food coloring :) (note: the color will fade with baking so go a shade darker than you want your cookie to be) increase speed to high and mix until whites form stiff peaks. 


Turn off mixer. Sift your flour mixture over the whites. (This next step is where it can all go wrong) 
Begin folding the mixture together. (If you over mix the dough the cookies will crack but if you undermix it the cookies won't have the famous "legs" that macarons are famous for). You want the mixture to be smooth and shiny with a viscous consistency, with most of the bumps out. 

Sifting over egg whites.


Mix it until you think you have succeeded and then fill a bag or pipe with a little batter to test it. Make a 1 inch circle on the wax paper covered cookie sheet as a guide for piping. 

After piping, if your cookie falls without any bumps - you did it. If it is not smooth, mix it a little more. 

Below is a picture of what it should look like after piping:


Step 3:
Transfer all of the batter to a pastry bag or regular bag (cut a small whole in the corner of the bag if using ziplock) pipe 3/4 inch or 1-inch rounds on the wax-sheet lined baking sheets- dragging pastry tip to the side of the rounds instead of forming peaks at the top. Once you have finished, tap the whole sheet on the counter a few times to get all the air bubbles out. Let stand for 30 minutes! (This is important) 
 Another picture below! 


Step 4:
Reduce oven temperature to 325 degrees. Bake one sheet at a time, until macarons are crisp and firm, about 10 minutes. After each batch, increase oven temp to 375 for 5 minutes then reduce to 325 degrees. 


(See those cute little "legs"!) 

STEP 5:
Immediately take the whole sheet of cookies on the wax paper and carefully put then onto a cold counter (still on the wax paper- this will aid you later when trying to get them off) if they still stick spray the under side of the wax paper with hot water....(be careful) this will also help you! 

Step 6:
For the filling

Push raspberries through a strainer to get juice out free of seeds and mix the raspberry juice, softened butter and powdered sugar together until they reach a frosting consistency. (If it seems a little liquidy, add more sugar!) mine was a little bit raspberry heavy but the tartness is nice with the sweet cookie!


Fill one side of the cookie and place the other side on top (each cookies usually has a size match) :) 


If you got this far you have successfully made the "hardest cookie to make"! 

Grab a bottle of champagne (Banfi is our favorite) and snuggle up with your valentine or your best friend! Enjoy! 


                            Xoxo 

                            Kasia 
             With a lot of help from Keren! 

Sunday, January 26, 2014

Little Lady

Is there anything better than a brand new squishy baby? Chubby cheeks that were made for kissing and soft skin made for hugging? Nothing. At some point though, the clothes must go on and so begins a whole new obsession. Baby fashion. This obsession began moments after I, Kasia's sister Keren, became a mother to the chubbiest, most bright-eyed baby girl I have ever seen. She obviously needs a wardrobe to match her stunning features. I soon realized though that pants that fit her yesterday are now cinching her belly a little too tightly today and so no, it's not worth spending $20 on a pair of pants that could be worn once in her lifetime. But it's so cute. So we mix and match. Splurge and save. Because this little personality needs to shine through without making Daddy wince.


The shirt is black and white with scalloped-edged stripes, on sale for $2.99 from BabyGap. Can you get a better deal that that?? 

These are awesome neon-yellow pants from Carter's. Let's talk about Carter's. I am very skeptical when it comes to this store. Their clothing seems to be not as well made and the style somewhat questionable. But...if you really look hard there are some hidden treasures. When you buy these pants, go up a size because they have a handy-dandy "adjustable" (with buttons) elastic waste band, pictured above. Their official name is Mini-Blues Stretch Skinny pant. They also come in hot pink and mint green, perfect for the spring. These were originally $26.00 (!!!!) but I got them on sale for $12.99 (much better).

Are these not the sweetest thing you have ever seen? Splurge? They were a gift from my wonderful sister-in-law. Here are the details. Jcrew Baby, swoon. $30.00 Not bad. 


Headbands are what make little girls stand apart. This one was made by KasiaRuth. Maybe an etsy shop link will be coming soon?

Hope your next baby shopping trip is successful and fashionable. What is your favorite baby fashion find?


xoxo
Keren

Friday, January 24, 2014

The Pixie

Can I tell you why I love the Pixie pant? 


I mean love. Literally, I have to force myself to wear other pants so that my co-workers don't think I have a laundry problem.

(Mind you I am a towering height of five feet, zero inches tall). short or tall, this is a pant you should have in your wardrobe and here is why:

Those of you who know me know I worked at J.Crew Factory for a little while so I am definitely  proponent of J.Crew-ness all together... sorry if that gets repetitive. You can and SHOULD buy these pants at J.Crew or J.Crew Factory in most sizes- and my favorite little fact is they come in Short! They come in navy, black and with or without leather detailing prices ranging from 80 (on sale at the Factory) to 160 (at regular J.Crew with leather). If you are below 5'3 you understand that you can rarely find a pair of pants that you can wear off the rack without getting them hemmed... that stops with this pant.

The Pixie has this great little feature called the seamless roll. Ok now you are thinking, what is the seamless roll?? I totally made it up. Basically, when you roll them under, if you make sure to tuck them well, you can't tell AT ALL that they are rolled. I do it everyday. I also find if you roll them up into cuff's it adds a little more personality. You're choice, put them on in the morning and just let the rolling fit your mood for the day!

Next reason is, this makes them amazingly versatile. You can wear them shorter in the summer with a great flat (or if you're like me and refuse to obey the winter rules, as a former Miami dweller, flats in the winter too). Or you can opt wear them longer with a great bootie, pointy heel, peep toe, or a riding boot. The possibilities are endless.

Ok so next reason I love the Pixie, is the extreme comfort and day to night versatility. If you know me you know I work in a law firm by day, am a tutor, a student, and an Auntie by night..... so I wear a lot of hats. In order to wear all of those hats well,  and not make multiple trips back home for outfit changes, I need a pair of pants that will be able to work in all of those scenarios. (minus the gym... I haven't tried working out in these..... maybe I will and then letcha know) These pants are unbelievably comfortable but have tons of structure. Now girls, I know the legging look is comfy, but I promise you, this is the way to go. Leggings are great to sleep in, or maybe under a BIG (behind covering) sweater, but not for the everyday. The bending over and having see through pants is not something we want to be told is happening to our wardrobes. The Pixie feels like a legging, but way more secure. Simply said, there is definitely more structure for those areas ... that you... well... want more structure for; not to mention the adorable little zipper up the back of the pant.

Ok so the price.... can be pricey. However, because J.Crew and the Factory sells this pant your options expand a bit. I know there is some controversy between whether or not the Factory is "cheap" or "not as good quality" but all I have to say is.... my pants are great and they are from the Factory! (note: if you look for them at the factory they are called the Gigi- but they are the same pant!) They are so worth it. It's easy to spend a lot of money on cheap pants so you have options, but with the Pixie I promise you will :)


Ok girls, your turn, this pair is waiting for you :) 

Wednesday, January 22, 2014

Hot Tata


Last night it snowed between 6 and 10 inches, at least that's what the weatherman told us. Waking up to a bitter 3 degrees and knowing that shoveling snow is on your to-do list makes me want to sink into a case of seasonal affective disorder. I've challenged myself though to find joy even in this frigid January moment. So what's better than a steaming cup of hot chocolate or tea in your favorite mug?
What you will need for the mug:
  • A white mug (I found a box of 4 mugs at Marshalls for $5.00)
  • A gold sharpie paint pen- Medium Point Oil Based, to continue the gold obsession (I got mine at AC Moore, about $2.00) 
  • An oven
These are the mugs I used.  White with a little gold edging at the top.


 Here is the sharpie pen. 


Choose whatever design you would like. I did gold dots on 3 of the mugs and song lyrics I love on the last one. Be creative! (There is an extra mug in the picture that my sister did.) 


Listen up people, this is important. In order to make your mugs last you need to bake them. The one problem with the gold paint is that it is not microwave or dishwasher safe! Starbucks and Target mugs pose the same problem. Sorry! Wait 24 hrs before baking. Start with a cold oven. Put the mugs in. Turn your oven to 350 degrees and bake for 30 minutes. When the 30 minutes are up turn the oven off and let the mugs cool down to room temperature in the oven. 


What you will need for the tea, formally known as a Hot Toddy, a recipe from my dear friend Amy:
  • 1 oz of Brandy or Whiskey 
  • 1 tbs. of honey
  • 1/4 of a lemon
  • 1 tea bag of your favorite black tea
  • You can also add cloves, cinnamon, apples or oranges. A very yummy addition, I just didn't have any in the house. 

Heat your water. 


 Coat the bottom of your newly made mug with honey. Yum. 


Add lemon juice and then hot water.


 Insert your favorite black tea.


Add your liquor of choice (I used Brandy, one or two cap-fuls depending on your day).


Enjoy!


Tuesday, January 21, 2014

The Dreaded White Wall Problem

Does anyone else have a those really annoying white walls (or in my case beige--which is honestly almost worse than white)  that have absolutely nothing on them except maybe a few holes, or maybe a few puddie filled holes, OR maybe a really random nail-begging for a frame? Whatever the state of your walls- your excuses for the lack of art on any of your walls may be like mine- all over the board. It might be because you haven't had the time, or maybe because you have not found anything quite lovely enough to adorn your walls for years to come (not to mention you will be seeing this everyday) or maybe its like mine--'I promise, I have been trying to find the time to paint my walls since I moved home after college' (yikes, almost two years ago!) so I'm waiting to hang something until they are the perfect shade of _________ (you fill in the blank). If you are like me, you might have a problem with wanting to change the decorations/style of your room or office quite often. However, as we all know, there is always the issue of expense especially when it comes to art work. SO how can we all get super cute, inexpensive, (sometimes trendy), and versatile prints that inspire you everyday?

Pick your favorite color, verse, quote or saying and make it! 

I found somewhere in my early teen years that I liked to be creative however, only recently did I realize that I find painting and projects to be unbelievably relaxing (I mean more so than even a bubble bath, can you believe it?)  Give it a shot and see how you do :) 

You will need the following items: 

  • Paint (I used acrylic-Michael's has sets of paint with paintbrushes- $10 for the whole set!!) 
  • Paintbrush (small narrow brush) 
  • Cardstock (whatever color your heart desires- A.C. Moore usually has great sales on cardstock, 33 cents/sheet!) 
  • Adhesive, reusable stencils  (check out Martha Stewarts line of stencils here http://www.michaels.com/Martha-Stewart-Crafts™: but before you buy them at Michaels, look in the Marshalls craft section. I found mine for $1.99 for each set of full alphabet letters).  
  • Frame (I love white frames because you can always paint them: check out Marshall's sale rack. I found the one I used here for $4- Can't beat that.)
  • Ruler 
  • Pencil 
Ok, so first, pick your favorite quote! I use pretty short ones only because it takes a little time to line up all the letters (actually, a lot of time, if you're a perfectionist). Write it out your phrase or verse of a separate sheet of paper- just to make sure you spell everything right. 
Next, measure and cut the cardstock to fit the inside of the frame. This part can be a little annoying if you don't have a ruler so make sure you measure correctly so the cardstock fits nicely.
For the next step, measure so that your words and letters are lined up with the proper amount of space between each (I marked the page with my handy pencil so that the spacing was correct) Next, start peeling off your stencils letters and placing them on the page. 

(Don't mind the fact that the "n" in wandering is a flower and the other random letters that are supposed to be "to thee." The amount of letters that came in one package was not enough to do the entire phrase, so I improvised just for the sake of lining up the words and knowing that I had enough space.) 

Next mix up your color, pick a shade that doesn't hurt your eyes and make sure you won't get sick of it too quickly. I picked gold ... clearly a trendy favorite of mine. I used an acrylic base paint and then once it dried I went over it with a lighter gold stamp ink (this is an added step) just for fun.

(polka dot pajama set- gap.....Just kidding this is NOT an outfit post) 

AFTER your paint has dried, (make sure its dry) peel off the stencil letters. (helpful hint: put them back on the sheet in alphabetical order, you will thank me next time you go to use them). 


So now put the sheet in the frame, (again you can always paint the frame with acrylic too) and you're done, literally done. You have a tasteful, inexpensive, versatile and trendy piece of artwork :)

I actually did not have time to find a frame for this print (sorry!!), but, the print below "Be Still" is another one that I did and followed the exact same steps. :) I love the fact that these prints are a reminder of the things I need to hear everyday most, and I see them everyday.


My walls are still beige... but the pop of pink helps me appreciate them a little more :) 
and finally, 


Enjoy crafting! 
More to come.... 

xoxo

Kasia